Walkthrough guide
This article will lead you through the steps necessary to add new candidates to the system.
Firstly, navigate to ‘Reference Data’, and then select ‘Candidate Entry’.

This will bring up a list of all existing candidates on the system. To add a new candidate, click the ‘Add new Candidate’ button at the bottom of the page.
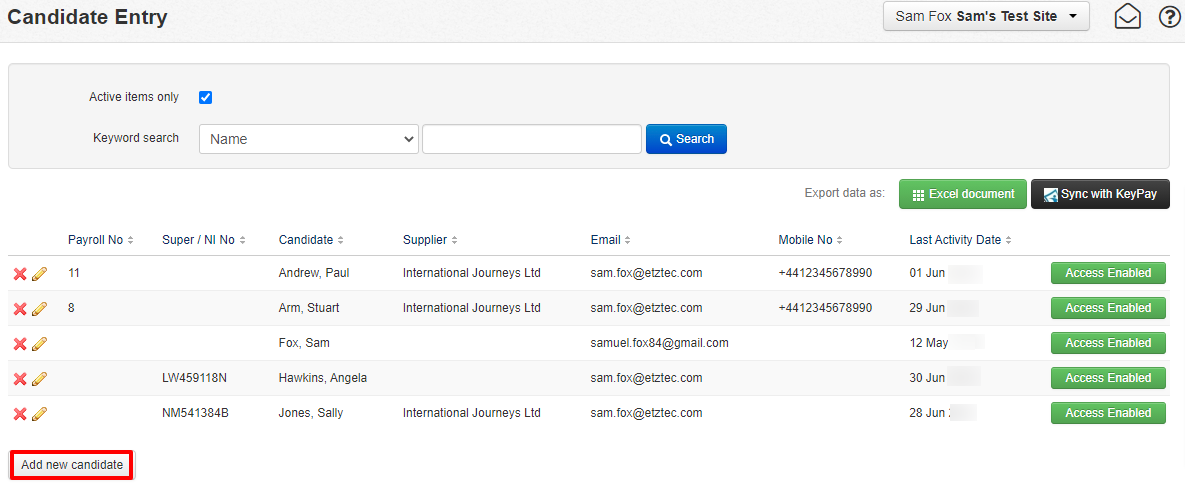
This will take you to a form, where new candidate details can be entered.
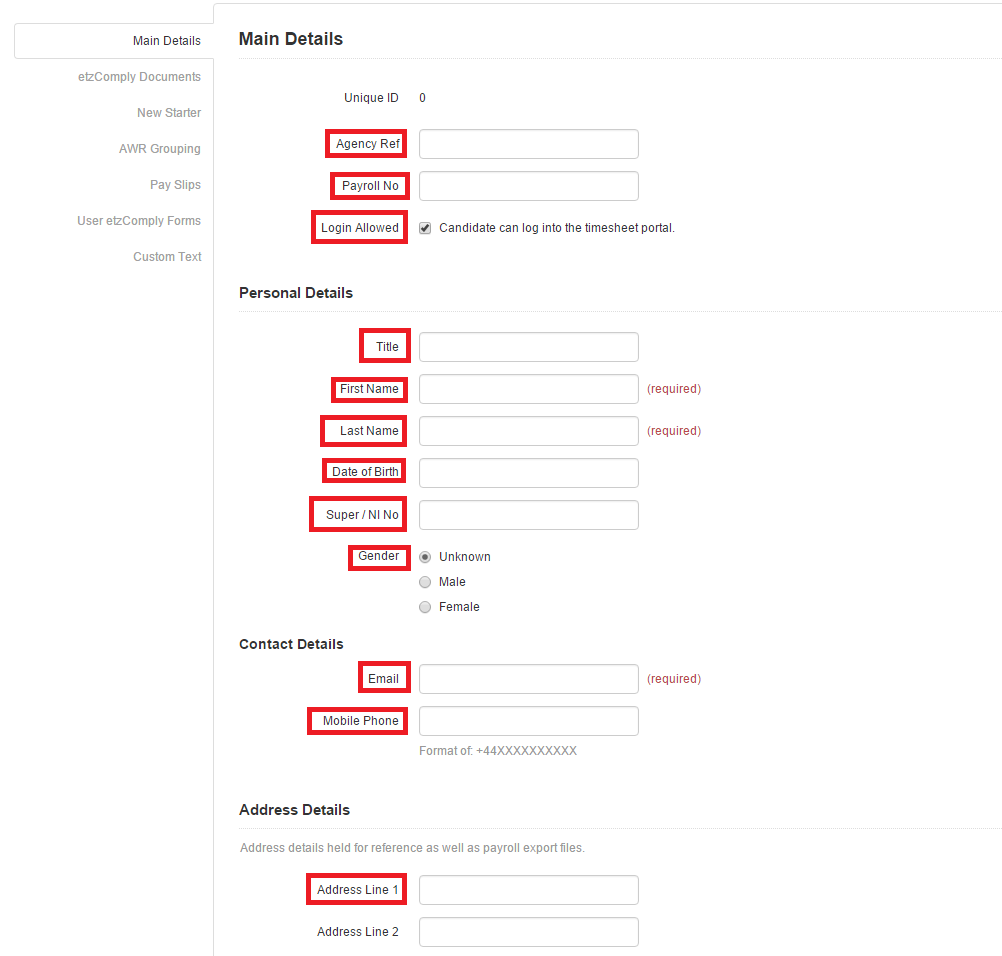
Agency Ref: The id used for importing data.
Payroll Number: For PAYG and PAYE candidates, it is important that the correct payroll number is entered, as it will be used by the system to link the candidate to your respective payroll system.
Login Allowed: Tick box must be ticked in order for the candidate user to gain access to the system and submit timesheets for approval. This field can be un-ticked if access to the system needs to be removed for any candidate.
Title: Mr/Miss/Mrs/Ms etc.
First Name/Last Name: First and last name of the candidate.
DOB/ NI No./Gender: Used for reporting on HMRC Section 16.
Email: Candidates email. This is particularly important as it is used to communicate contact details and timesheet notifications to the candidate.
Mobile Phone: Candidate's mobile number
Address: Candidate's address.
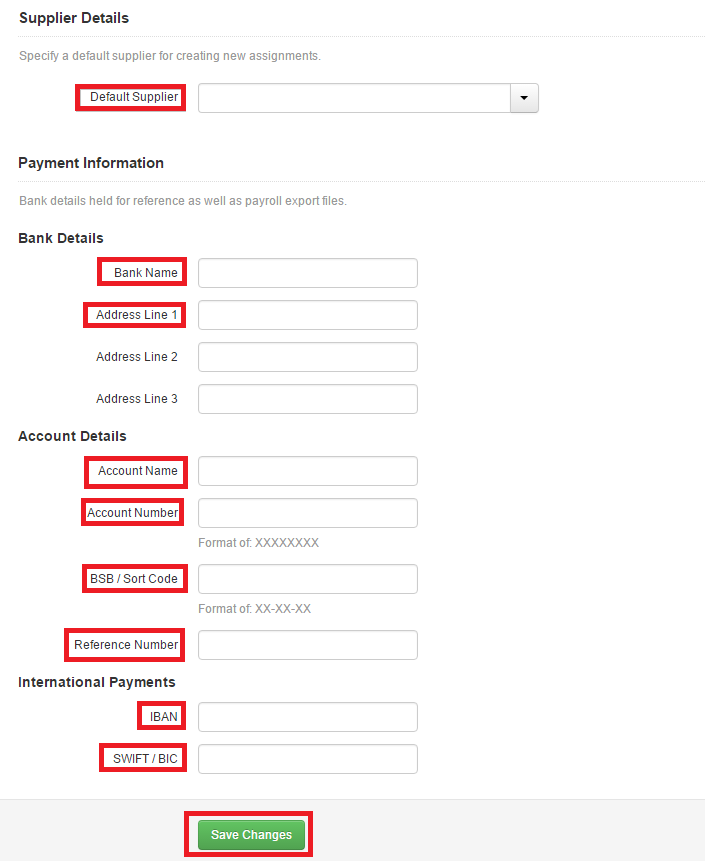
Account Name: Name of the account
Account Number: Account number associated with the candidate's bank account
BSB/Sort Code: Candidates BSB/sort code
IBAN/SWIFT/BIC: Used when making international payments.
If the candidate is not paid via PAYG or PAYE (i.e. - they are employed under a Ltd. or umbrella company), the only fields that are required are the ‘First Name’, ‘Last Name’, ‘Email’ and ‘Mobile No’. The relevant company should be selected from the ‘Preferred Supplier’ drop-down.
If the candidate is paid via PAYG or PAYE, then, in addition to the fields above, ‘Address’, ‘Payroll No’ and ‘Bank account details’ are also required. The ‘PAYG/ PAYE Candidate’ option should be selected from the ‘Preferred Supplier’ drop-down.
Once all the necessary information has been entered, you can save the details by clicking on the ‘Update’ button.
As a follow-on, you may wish to read the article: What does a candidate see in their candidate portal?